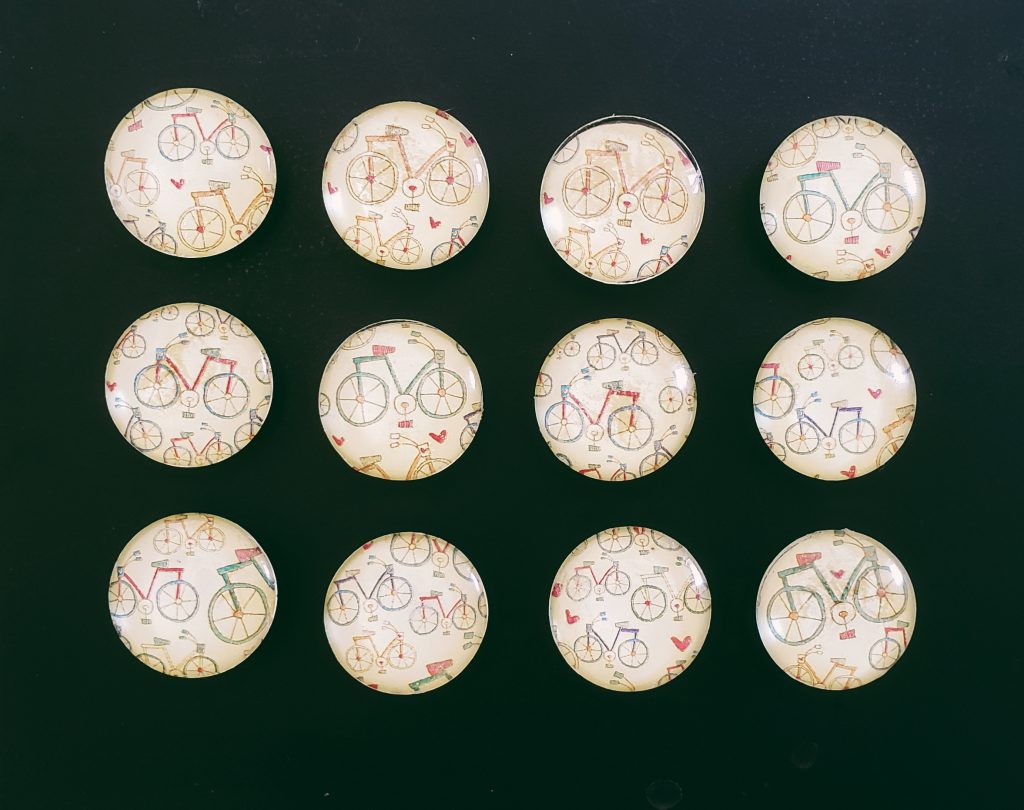
If you are looking for a quick and easy DIY project with your kids, a fun gift, or a way to spruce up your magnetic board….then then you need to give these magnets a try! A project that can be whipped out quickly is always a win in my book.
Growing up with a mom that was a kindergarten teacher….and a great one may I add….we had an entire closet dedicated to art supplies and crafts. This small closet was set up with a kids table and little chairs pushed up against the back wall. The entire wall above the table held shelves full of endless craft possibilities and every possible craft supply you could imagine. Underneath that very bottom shelf was a light so those nights we couldn’t sleep, we could get up and get busy in that closet. On the inside of the closet door hung a shoe organizer full of the smaller craft supplies. I still remember all the fun crafts we did with my mom, including these marble
So whether you are looking for a fun and easy afternoon craft to do with your kiddos, or a way to spruce up those plain magnets you currently have, these are a fun way to go!
This post contains affiliate links, which means I may earn a small commission if you purchase through them—at no extra cost to you. Your support means the world and helps keep this blog running. I only share products we actually use and love, and I’ve included them here for your convenience. Thank you for supporting our journey!
Here is what you need to get started:
- Colorful paper
- Pencil
- Scissors or a circle punch (optional)- This is so worth it for $8 if you want to whip out this project quickly. It will have you so much time!
- Mod Podge
- E6000 glue
- Clear glass beads
- Round magnets
- Craft mat ( to protect your table )
Getting started

Step 1 / Getting set up. Pace your paper on your work space and lay out all your supplies

Step 2 / Trace your gems. Trace around the glass gems on the front of your paper using your pen.

Step 3 / Cut or punch out the image . If you have a circle punch, you can skip step #2, and instead start punching out your circles.
TIP: Cut on the inside of the circle you traced. You want the paper slightly smaller than the gem. This way you don’t have the image bigger than the back of the gem which will eventually tear and doesn’t look as neat.

Step 4 / Add your circles. Glue your paper, picture side up, on the flat side of the glass marble using your glue. Press to evenly distribute the glue. Set aside for a few minutes to give time to dry.

Step 5 / Seal in circles. Using your foam brush, spread a THIN layer of Mod Podge on the back and let dry for 20 minutes.

Step 6 / Add your magnet. Using your glue again, add a dab of E6000 glue to attach the magnet to the flat/back side of the marble. Firmly press to make sure it adheres. Put aside to let it dry.

TIP: When you are adding magnets to the back, make sure there is AMPLE space in between each one as they dry! Otherwise they magnets will be, well magnetic 🙂 and you will end up with a huge clump and mess of magnets and glass marbles.
UPDATE: So after doing this several times, I would opt to use the CLEAR E6000 glue instead of the black which I had used previously. Depending on the type of paper used and how dark it is, on some, the black will show as a darker spot on the front of the glass magnet. Avoid the guess work by just buying the clear glue from the start 🙂
See how simple these are? Such a fun way to display kids artwork, photos or even hang that important note with the reminder you can’t forget 🙂
What fun designs have you done with glass magnets? Share with us below in the comments!
XO,
Morgan


