

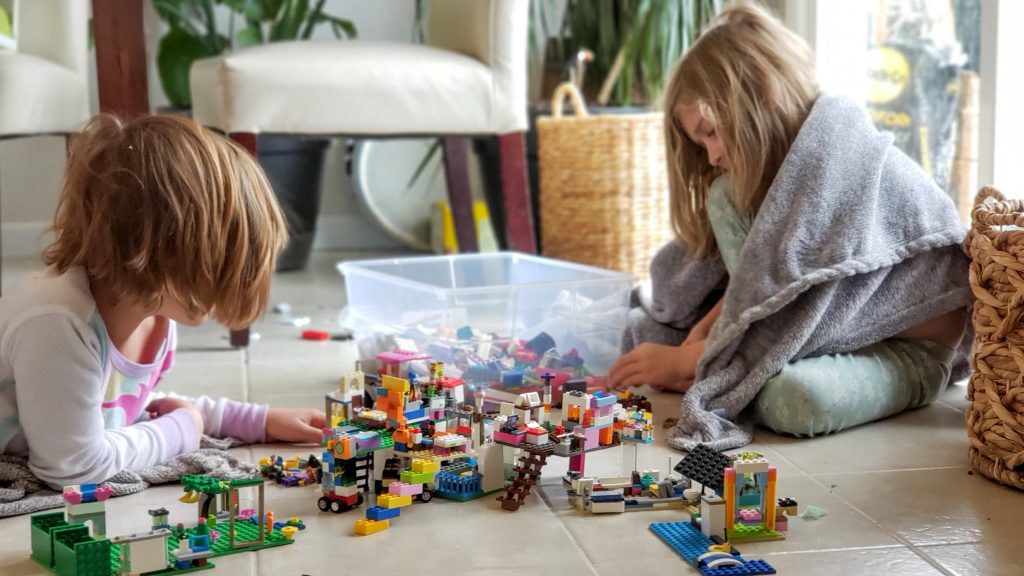
Let’s talk toys, shall we? I love listening to my kids’ creative games they come up with while playing with their toys. I love that they can take just about any little McDonald’s figurine and turn it into the most elaborate play.
However, I am not a fan of the mess that comes along with it and stepping on those darn legos at 2 A.M. when I’m up to feed the baby in the dark. Yes, I understand part of that comes with the territory of having children and having kids that play. However, I have to live here too. Plus when my home is my office as well, I’ve been searching for a way to control the chaos of all the toys we have scattered all over the house without interfering with their creative play.
Advice from a retired Kindergarten teacher of 25+ years
With the help of my mom who just retired from teaching kindergarten after 25+ years and all her knowledge and experience…..at 30 years old, I’m finally starting to listen to my mom and implement her suggestions 🙂 These are the ideas she has shared with me and so I wanted to pass them along to you! Hopefully, you will find they help maintain more organization and simplify your life with kids as they have with me! Thank you, momma!
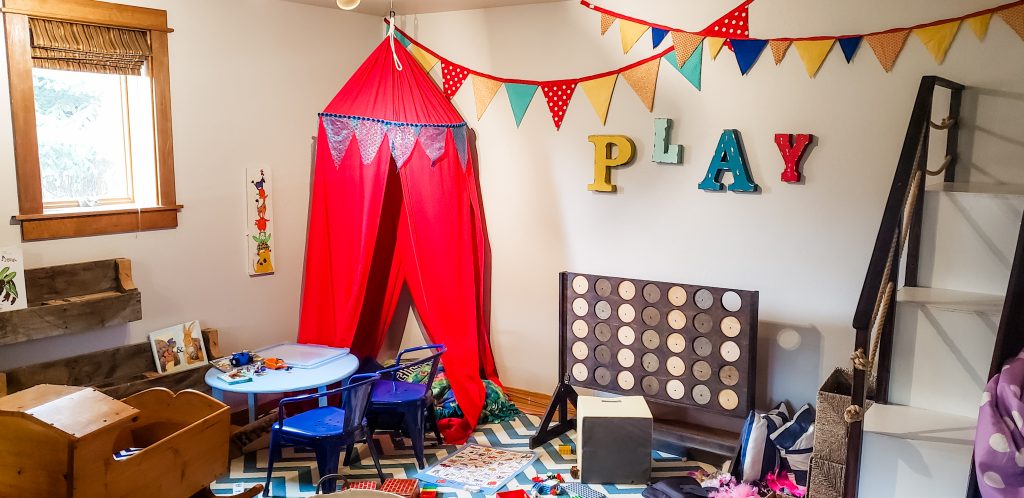
So if your playroom or living room looks like this….keep reading to find out how I got our explosion of toys under control!
Let’s get started shall we?
As a blogger, I may earn a small commission for any purchases made through the affiliate links on this site. I want to make it clear that your support means a lot to me and helps keep this blog running. Please note that using these links will not add any extra cost to your purchase. I have included them for your convenience, and I appreciate your support in using them.
What you need:
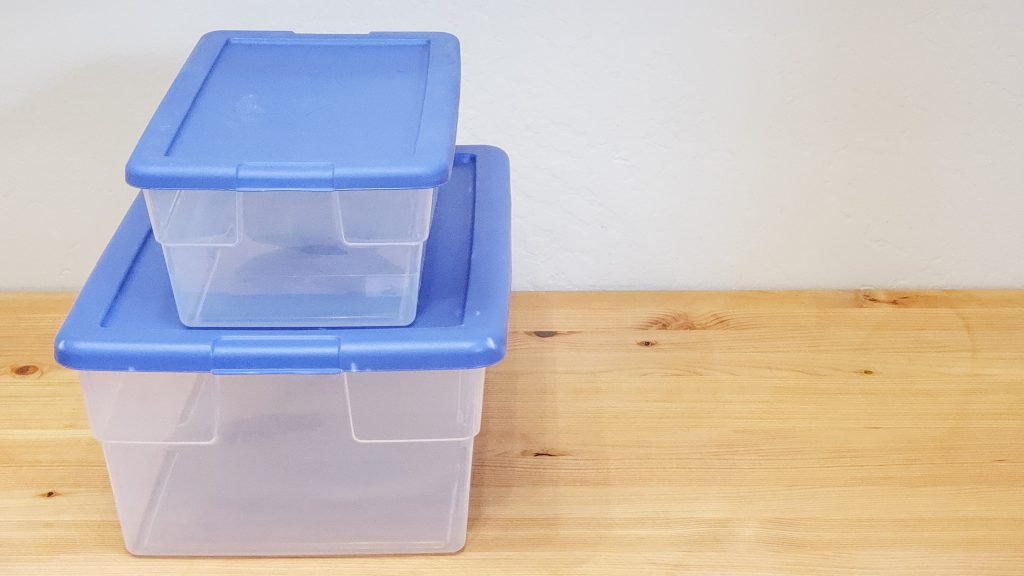
- 6-quart clear storage bins
- 16- quart clear plastic bins
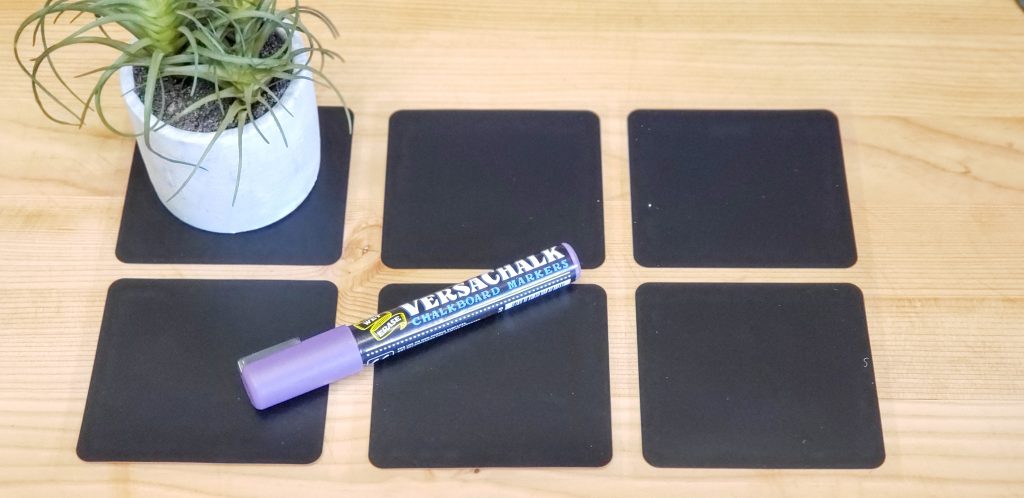
- Chalkboard sticky labels
- Fine tip liquid chalkboard markers
- Donate box
- Discard box
- Keep box
If you are ready to hear less of “I’m bored” “I have nothing to do”, and see less of their toys overtaking every room, then keep reading!
Getting started:
Whether or not you do this organizational project with your children is completely up to your discretion. I chose to do the first step by myself when they were asleep. I then involved them in the rest so that they could take some ownership, but also see and be apart of the process so they thought before they just dumped the bucket out again.
Step 1 – KonMari all the toys
If you haven’t heard of the KonMari method, then hop on over to this post and read more about how to take her method and make it work in your favor. I really have found starting off any organizational project with this process helps to maintain the organization, in the long run, making it successful!
So read through that, and then start by finding every single toy in your house and placing on a large open floor space. Don’t forget to check odd locations such as your purse and car 😉
Step 2 – Lay out all the bins
Take all your bins and un-stack them and arrange in rows on the floor. All the larger bins together and the same for the smaller ones.
Step 3 – Sort the toys
At this point, if you followed the KonMari Method, you should have three full boxes. Remove the Donate and Trash boxes to help clear out your work area.
Taking the Keep box, begin sorting the toys by whatever method works best in your home. For example, these are several of the categories that I divided up toys into.
Keep in mind what toys you have and the size and quantity of them when deciding how many bins and what sizes to purchase. Most of these toys fit easily into the 6-quart bins. However some of the larger sets like the Playmobil, the Brio builder set, and Legos I used the larger bins.
- Magna-tiles-These magnetic building tiles are so fun! Think fun, and less frustration building options for kids ages 3 and up!
- Baby Builders
- Bristle blocks– Easily build anything with these blocks! No frustration and great for little kids because there are so many ways in which to build on these.
- Squigz builders-These suction builders are fun for any sort of play including bathtime! My kids love that they suction to things 🙂
- Ponies
- Playmobil farm set
- Playmobil zoo set
- Playmobil pool set
- Marble run
- Viahart brain flakes-These are great for 5 yrs and up. The sky is the limit on what you can build!
- Star flecks creative connecting construction kit– Similar to the Viahart brain flakes, but in a larger size, they are great for younger kids as well who like to build!
- Brio builder set– These wooden building set are an awesome toy to practice building using nuts, bolts and the coordinating tools to build anything imaginable!
- Little People toys
- Animals
- Cars
- Random McDonald’s figures
To clarify sort absolutely EVERYTHING! Think about how your kids play with them. Do they like all the figures out together to play a game, or do they like the figure to be with the coordinating set? Do they like the barbie dolls all together in one tub? With accessories in another? Or do they like them divided into sets with one or two dolls with the coordinating accessories?
You want to organize/separate the toys based off how your kids like to play. This will help maintain the organization and help this to be a successful change.
Step 4 – Write out labels
Now that you have everything divided into bins, using your chalkboard sticker labels and liquid chalk pens, write out the content of each bin and apply to the front.
Depending on the age of your children, either use words, simple pictures or a combination of the two. My five-year-old doesn’t read yet, and so with mine, I have both the word as well as a simple clipart style picture.
This not only helps them to put the toys back in the correct bin but helps you to quickly find the bin you are looking for.
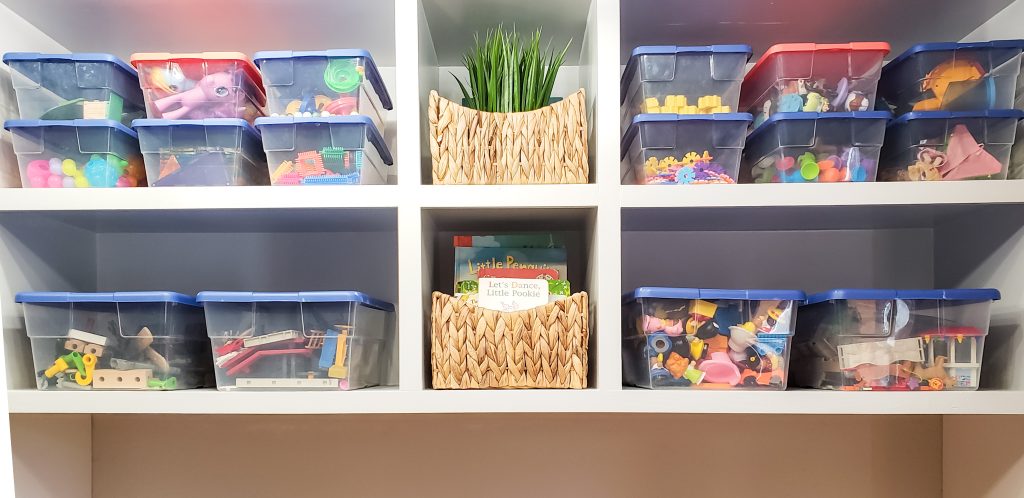
Step 5 – Store away bins
Last but not least, it’s time to find the location or locations that you will store these bins. I can’t stress this enough; this is the MOST IMPORTANT STEP!
These bins need to be up on shelves where the kids can’t easily pull out on there own!

Why this works
Maybe you are wondering ok yeah, great. Toys are organized, but why is that going to help in the long run?
Here is what we do. These buckets are stored on high shelves. Something that the kids “shouldn’t” be able to pull out alone. When they want to play with something, they have to come get me and ask.
I’ve chosen to always say “yes” when they ask. If we are getting ready to leave the house then I explain that they have the choice to pull them out and have a short 5 minute play time (but that they will have to clean up before we leave), or would they like to play when we get home for longer?
Kids like to feel like they are in control. This decision gives them that, but on your terms. Knowing that I will always say yes has meant they don’t try and sneak the toys down.
Rules of the toy buckets
We have a few simple rules the kids have to follow. Be religious with following these and you will end up with a toy organization system that works and will continue to work long term.
- Clean up when finished. – You ask for the bucket, you clean it up when you are done. Because the buckets are small, it is a manageable amount for them to clean up quickly by themselves.
- One bucket at a time. – Do you want another bucket? Sure, clean up the one you already have out. (If there are coordinating sets that they want to play with at the same time, I will pull out two simultaneously.)
- Buckets are put away every night. – Nothing left on the floor.
That’s all folks!
A simple yet effective idea; this single organizational idea has helped in numerous ways. It has helped the kids to actually use and play with all their toys, they play better together with less conflict, they play with each toy for longer giving me a break or a chance to catch up on something, and most importantly, this idea has helped to keep all the toys off the floor and my house more organized!
Fewer toys out and available at a time, as well as coordinating buckets, help to make cleanup a breeze and a simple idea for the kids to follow! I chose to go with these two sized clear bins because they were sizes that the kids could carry and return to the room themselves allowing a sense of responsibility and accountability.
More toy organization ideas
If you are looking for more ideas on toy organization and how to keep your kids excited about their toys and playing with them, read more of my momma’s amazing tips from teaching Kindergarten for all those years right here!
Hope this idea helps you organize all the toys in your life 😉
XO,
Morgan


1 Comment
A well-organized toy rotation helps to eliminate clutter, while allowing children to play with a wider selection of toys. Since the available toys change on a regular basis, there is always something new and exciting to play with, ensuring your child will never get bored.