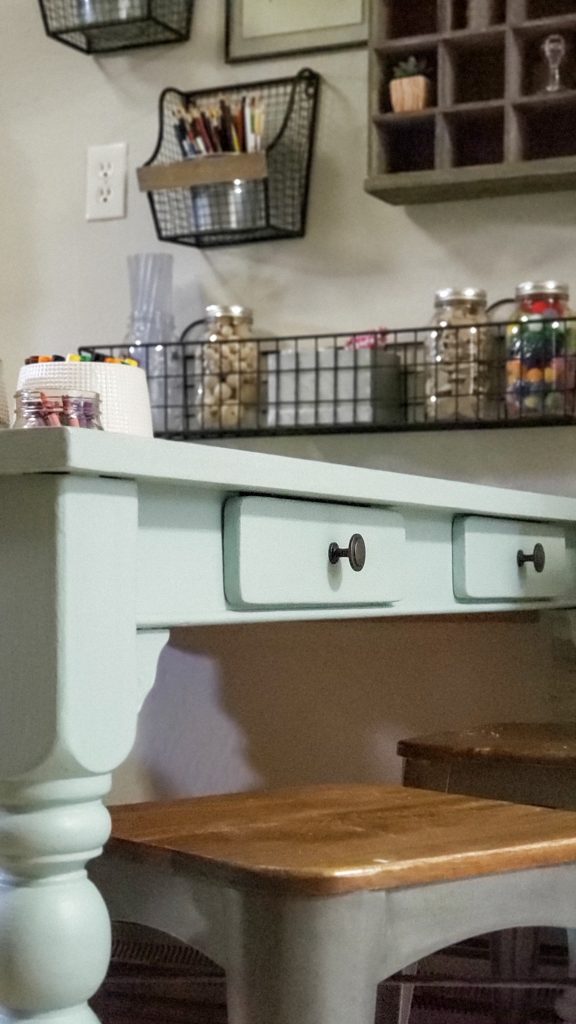
Let’s be brutally honest here for a second, shall we?? I love DIY projects….but I can’t stand sanding! I will do anything to avoid sanding, and many a time, I have paid the price for skimping on this step. So when I found a paint that doesn’t require a ton of prep, you can bet I needed to give it a try! This paint is the perfect way to update a piece of furniture that is in need of a face-lift without the time commitment required by most other paints!
Craft room work area
I am all about functionality over the actual size of a house. Personally, I would prefer to have the perfect layout and rooms that fit my families needs and interests, rather than just a huge house. So I was thrilled about the fact that our home has a large space downstairs for us to do projects!
This long room we are slowly updating into the perfect craft and mud room! It is my absolute favorite room in the house.
Handy hubby built me this amazing 22′ built-in work counter complete with both upper and lower cabinets. While I am in love with the storage….this was our second project in this house, and it was a major flop haha!
Major flop

The storage of this project is perfect and functional! However something happened, and the top of the work area isn’t even usable at the moment besides for more storage 😉 The boards bowed and split, like really split.
So while that table is on handy-hubby’s list to fix and re-make, I’ve been on the lookout for the perfect craft room table that will compliment my built-in work area and cater mainly to the kids and be the perfect space for them to create.
So when I found a table that would be perfect for that space, I was excited! Finished in a shiny black, I was half tempted to leave it for now just to avoid the awful step of sanding. But then my handy hubby mentioned I should check out chalk paint!
Chalk Paint
For those who haven’t heard of this type of paint, it’s technically supposed to be a paint that doesn’t require you to sand the furniture prior to application. And who doesn’t love skipping that step?!?!
However, a little birdie reminded me that no matter what is advertised with a product; what you put into it, is what you will get out. That if there were scratches or dents beforehand, that they still would be there after painting if you skip all the prep work.
Ugggggg hahaha! This particular table had some random screw holes, some dents and scratches. So I decided to listen to this “little birdie” aka handy-hubby 😉
But, this is where the awesome benefit of chalk paint comes into play! Yes, I did a little bit of sanding and hole filling, but when I say a little, I mean maybe 30 minutes start to finish!
Quick DIY using chalk paint

With these tools, I was able to relatively quickly and simply take this table from dark and beat up, to a light and airy table perfect for a craft room table! This was my first project with this type of paint, and I am hooked! I love the reduced amount of prep time, the ease of working with it, and the end result! Chalk paint is the perfect paint to update a piece of furniture quickly and have a gorgeous end result!
This post contains affiliate links, which means I may earn a small commission if you purchase through them—at no extra cost to you. Your support means the world and helps keep this blog running. I only share products we actually use and love, and I’ve included them here for your convenience. Thank you for supporting our journey!
What you need :

- Chalk paint
- Chalk paint protective coat
- Orbital sander + 150 grit sanding disks
- 150 grit Sandpaper or a sanding pad
- tack cloths
- 2″ paint brush
- Painters pyramid stands
- Painters tarp
Directions :
Step 1 – Pick your piece of furniture

This is the fun part! Pick the piece that is ready for a fun face-lift.
I found this awesome solid wood table at a local going out of business sale. When I saw the price tag, I knew I couldn’t pass it up!
Step 2 – Gather your supplies
Get set up in an area that you can spread out, and leave out for a day. While the individual steps don’t take too long, the entire process start to finish will take about a day with drying times in between coats.
As inexpensive as painters tarps are if you have one already pull it out! If not, grab oneStep 3 – Clean your furniture
This doesn’t need to be an extensive and time-consuming step. But grab an all-purpose cleaner and give your furniture a quick wipe down. The last thing you want is to have some nasty gunk and try sanding over it 😉 You need two things for this step: a sander and either a sanding pad or sandpaper. I would use 150 grit sandpaper. If you are sanding inside for whatever reason (I was in this case), save yourself a TON of clean up and dust, and attach your electric sander to a small shop vacuum! Most the dust will go into the vacuum instead of all over the room 😉 Electrical sander An electric sander is going to save you a ton of work and cut down on the time it takes you to complete this process. I love using an orbital sander like this one for all our projects. An orbital sander is amazing because unlike other electric sanders, it sands the surface more evenly and doesn’t leave sanding marks since it uses a rotating motion. We use this so often that it is worth its weight in gold in what it has saved us in time and frustration. Sanding pad Depending on what piece of furniture you are working with, you may or may not need this. I used my orbital sander for the table top, but this table has curved legs, and so a sanding pad or regular 150 grit sandpaper is what I used. If you aren’t familiar, a sanding pad is basically a foam pad with sandpaper encasing it. This allows you to sand surfaces that aren’t flat or have a straight edge. The foam conforms to the shape of the wood better. YOU DO NOT NEED TO SAND DOWN TO THE BARE WOOD! Oh my goodness please don’t! You will add so much work for yourself! You are simply scuffing up the top surface to allow your paint to adhere better! Take the extra few minutes and make sure you get all the sanding dust off. My go to is to use these cloths called tack cloths that are basically a sticky cloth that pick up the dust. They are especially helpful on rounded surfaces, intricate table legs, etc. I finish up with a slightly damp paper towel just to make sure I haven’t left anything on the wood that will mix in with the paint and leave me with a textured finish. The fun part! Time to see the first big glimpse of what it will look like finished! My biggest tip I can share is these little plastic pyramids. They go under the leg or surface of whatever you are painting or staining and securely elevate your project. The minimal contact design allows painted, stained or glued projects to be completed in one session with less mess and great results! Annie Sloane Chalk Paint There are a variety of chalk paints out there. A lot of people recommend Annie Sloane chalk paint. I’ve never personally tried it. But at $50 a small can just for the color (not including the finishing wax or special brushes) I decided that I wasn’t ready to spend that much for my first chalk paint project. Who knows, maybe at some point I’ll try it and realize its worth it 🙂 Rustoleum Chalk Paint For now, though, I used this Rustoleum chalk paint in Serenity Blue and so far, I’m really happy with it! This brand of chalk paint comes in a variety of colors! I needed just two small quarts to do a large table; one for the color and one protective top coat. The cost for both cans was far less than if I were to have purchased one can of Annie Sloane chalk paint since I already have brushes. Following the directions on the can, apply your first coat using a 2″ paint brush. Being that I was re-doing a craft room table that will take a beating, I did two coats of the color and two of the protective coat. Make sure to go back and make sure you don’t have any drips you need to clean up before each coat drys. I chose to apply two coats of the top protective coat since with this brand there isn’t much dry time required before a second coat. However, that is optional and up to your discretion. Personally, I figured the extra durability was worth it for an extra two hours of dry time if it helped the furniture to hold up and look good longer 😉 Give it a good day to fully dry before use and then it’s time for my favorite part; decorating! If you are looking for some other great project ideas for decorating, check out these fun and quick glass ceramic hanging wall vases! Or if you need a shelf to store small items, or help you get organized, check out these posts on DIY faux floating shelves! For more DIY ideas, make sure to subscribe to be the first to be updated on new project ideas 😉 I’m a newbie to the chalk paint train, what suggestions or things should I try?!?! Happy DIY’ing! XO,Step 4 – Lightly sand

Step 5 – Clean dust off
Step 6 – Paint


Step 7 – Add protective coat
Step 8 – Time to decorate!


Morgan


4 Comments
Super cool post!!!
Thanks so much!
Xx, Morgan
This is a great tutorial and makes me want to tackle some older furniture in my home this weekend 🙂
I know! Makes it so easy and fun to tackle those older projects 🙂
Xx, Morgan