


We are officially at the two-month mark since we got our bus; so I thought it was a good time for an update on where we are at with our skoolie conversion and what we have learned so far!
Why a skoolie?
Curious why we decided to jump on the skoolie bandwagon and purchase a 40 foot retired school bus sight unseen? You can read more about the process and why here 🙂
But the short and simple version is that we were looking for a way to flexibly travel the country with our family and pets. The goal is to be able to focus on family, quality time together, and exploring the USA.
Thankfully, both my husband and I work from home which allows us a lot of flexibility to do this! Now, the only thing standing between us and hitting the road is getting this school bus conversion done 🙂
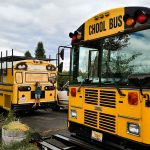
What it looked like initially


Seeing how much work it has taken to get to the point we are at, I am so grateful that someone before us had done a lot of the heavy lifting. The initial owner tore out all the school bus seats, the metal ceiling, rubber flooring, and even installed flooring and partially built out the bus.
We did end up tearing out everything that had been built out so far. The goal being that we wanted to build it from the floor up so we knew there were no leaks, and also so it would fit our very specific floor plan in order to fit our whole family.
This was our first bus disagreement 🙂 I wanted to keep portions of what had been built out and add to them. Have you figured out I like projects done quickly?!? Handy Hubby was adamant about removing everything. Looking back, it is good we did it his way because there have been numerous leaks we have found that we would have missed. Plus there was also a lot of mold hidden in places we would have missed had we left it. Score Handy Hubby; 1, Me: 0 🙂
I thought removing all this would be a quick couple of hours. Instead, this was the very first lesson I learned from the bus. Nothing, absolutely nothing is quick on a school bus conversion build 🙂
When will it be done?
This is the question we hear the most 🙂 I wish we had a definitive answer! I feel like every time I give a response to this question that I feel is reasonable, the bus steps in and pushes our date back again 🙂
However, I should clarify, when I say “done”, I mean that it has reached a state that we can comfortably use it. As we begin to travel and learn what we need to add and where, to make the bus even more functional for our large family, we will make these changes. But in the meantime, our goal is to simply make it usable so we can enjoy some summer trips. Most likely, knowing us, we will probably be doing small upgrades yearly to keep it as functional as possible for our little circus:)
Our timeline
Our timeline has become a bit of a joke…well kinda 😉 Initially, we were shooting to have it done by the end of June. A June deadline would have put us at a 2.5-month bus build. To put this timeline in perspective, many people take a year or two + to finish. Call us crazy to have this timeline….yeah probably 🙂 Guesses on when we will finish?!?
Our first mistake was assuming that since we purchased a bus that had already been gutted, we thought we could move along quicker than many bus projects. The first major lesson of a skoolie build we have learned; nothing is a “quick project” on a bus.
Every little task takes double or triple the time you think. So we pushed the deadline to the 4th of July to give us an extra week to “finish up.” Hahaha….yup, that’s not happening 🙂
So now, our 3rd (and hopefully final deadline) is the end of July! Wish us luck 🙂
Why the deadline keeps changing
When we purchased this school bus, I assumed that it would be pretty straightforward. We are not newcomers to the DIY club. So I figured we would “just” clean it out and start building. It is a whole lot more complicated than that as soon as you add electrical and plumbing needs.
With a skoolie build, you are constantly solving problems quickly and pivoting your ideas and plans. For every task you accomplish, you realize that there are two others that need to be completed before moving on. This one step forward, two steps back pattern means that we will have a solid build when we are done, but it is slowing us down in the meantime.
What we would change
It’s easy to say what we would do differently in hindsight. I think if we had been researching, planning and deciding on our needs before simply buying the bus, this process might have gone more smoothly. A plan would have helped to keep us on track and tackle tasks on the list rather than constantly be all over the place.
For example, since we are using spray insulation, we need to make any holes that we will have now. That meant we needed to know exactly where and how we wanted things done. Whereas certain projects we would have liked to tackle later on once we determined our needs, we are having to quickly pivot and make those decisions now. As a result, we have started our roof deck, solar panel system, skylights, electrical, etc before having a solid plan of how we are executing our needs. So we have a lot of partially done parts currently.
But, our trial and errors will provide a great outline on the best way to convert a school bus and provide you with everything not to do 🙂 We are doing the hard part for you:) So make sure to subscribe now to get those updates and save yourself a ton of headache and time on your trailer build!
Where we are at:

We are working a lot on the bus (mainly handy hubby at this point while I wrangle the kids :), but it has felt like we’ve done a whole lot of nothing so far 🙂 I mean there are some obvious parts that when we look, make it feel as if we have accomplished something. However, up until this point, a lot of the work has been necessary in order to move forward, time-consuming, dirty and it doesn’t feel as if we have much to show for it 🙂 Thankfully, it finally feels as if there is a light at the end of the tunnel.
Our next big step is to get the spray insulation done. The goal is to tackle that this weekend. After the insulation, we will be able to accomplish tasks more quickly! The buildout of the walls, beds, furniture, etc., is more of what we know well. Plus, I feel like that’s more of the fun part because you can actually begin to see the change and transformation which makes it exciting. Plus, that means we are one step closer to my favorite part, painting, sewing, decorating, and organizing!
Whats been good:

Handy hubby: Having the freedom to design it however we want and what fits our lifestyle and family. For him, designing the floor plan, picking out fixtures and appliances, watching the kids play inside, as well as hanging out on the roof with our two oldest girls for special time has been a favorite part.
Mama bear: I’m with him, watching the girls play inside the bus, coming up with their own games, bringing their imaginative play in there, or even wanting to help has been so cool to see. And I’m already noticing that our favorite place will be up on the deck! Kids are always asking to climb up there and watch the sunset or just have special time with one of us!
Whats been hard:

Handy hubby: Constantly being in problem-solving mode and quite often being completely out of your comfort zone, as far as knowledge goes; ie solar etc.
Mama bear: Holy moly its been hard for me up until this point. Like most people, working to find a balance and juggle everything can be challenging. I’ve felt a big pull between wanting to help him, be with the kids, work, household duties etc. Plus, the “prep” type work is usually what he does on our projects while I’m the finisher. As a result, this has all been way outside of my comfort zone. I’m definitely looking forward to the next steps which are more up our alley in terms of knowledge and skill.
Lessons learned so far
So so so so many lessons we have learned over the last two months of our skoolie build. Some good, some hard, and others we would have never expected. Make sure to subscribe to the blog to get the step by step guides on how to do a skoolie build; the easier way 🙂
I could go on and on about lessons learned but here are a few of the top ones:
- This is not a quick easy project. It takes a lot of patience, problem solving and good communication.
- There is a great community for school bus conversions to help get your questions answered and learn through others! Make sure to tap into those!
- A skoolie build can be as simple or as intricate as you want.
- It will cost double what you think it will.
- Planning will save you a ton of time and frustration.
- Be able to pivot your ideas and thinking- on a moments notice and constantly.
- Nothing in a bus is perfectly straight or squared- absolutely nothing.
- Get creative! You are given a completely blank canvas with a steel frame allowing you to completely customize the space to your wants and needs!
- Find the fun, laugh through the mishaps (they WILL happen), and slow down enough to enjoy the process 🙂


Thanks for following along on this crazy adventure of ours! Questions for us? Drop them in the comments below!
XO,
Morgan

Comments are closed.